Thursday, December 30, 2010

Crafting for Charity: An Exemplar

I have been thinking a lot about how to use my crafting for a greater cause other than my procrastination. Deciding to make a few dollars through starting a business is almost necessary to keep up with the price of the materials. I don't think that I can make much of a profit, at least not with the dolls yet. But I know that having the gift of craft and a bit of leisure time (even if most of it's time I should be spending writing for work) makes me more fortunate than most.

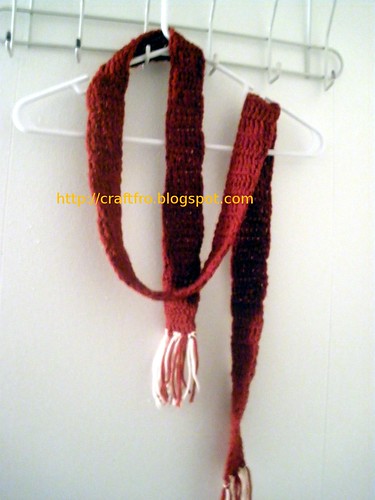
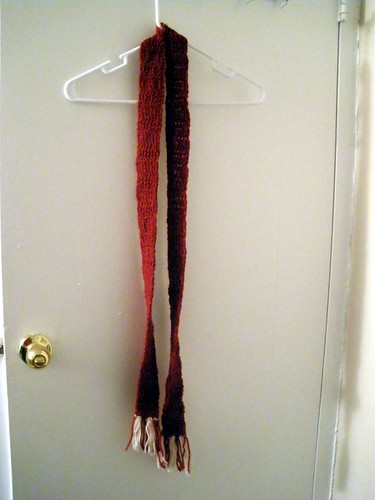
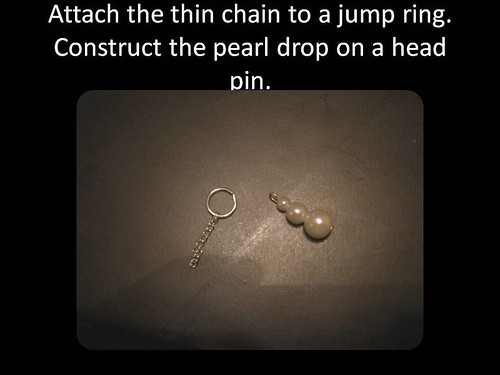
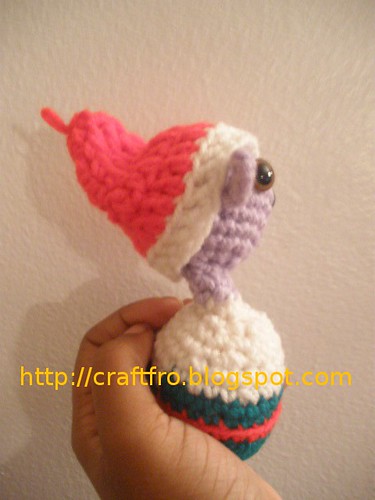
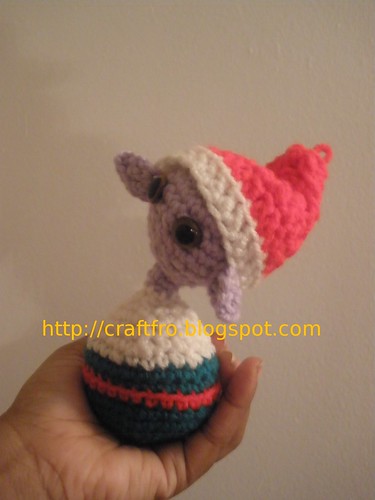
So, I'm resolved to make something for charity this year. Will I make dolls? Beanies for preemies? Will I join one of the many craft drives on the net? I haven't quite worked it out. I think I'll talk it over with some of my craft friends and we'll see what we come up with.

Looking for inspiration I came across this blogger's awesome idea for charity crafting in 2011 - http://minimalistknitter.typepad.com/mk/2010/12/2011-the-year-of-the-vest.html

What a great way to give your craft to those in need! What appeals to me most about her goal is that she has reached out to an existing charity organization that is in touch with the needs of the community that they serve and she has joined in their efforts. All to often I think people try to strike out and reinvent the wheel when doing things from charity. Having worked with charities and non-profits for work, one of the things I know to be true is that joining with existing efforts and focusing on who you serve always does more good.


Alas, a thick crochet vest would probably take me weeks.  And I'm not sure a farmer of any gender would want a the hippie vests I know how to make with  hook. Maybe something like this would be better:


http://www.lionbrand.com/patterns/ccusa-denimVest.html?noImages=0
 I usually don't have any desire to knit, I'm a crocheter at heart, but the prospect of joining in the Minimalist Knitter's Year of the Vest has me reconsidering the two sticks.


Until next time,
~Dee

Wednesday, December 29, 2010

Craft Inspiration: Ndebele Dolls from South Africa


Aren't they wonderfully beautiful?
The Ndebele and Zulu women of South Africa traditionally made these beautiful dolls to give young woman at the time of marriage. In recent years these dolls have become one of the many handmade crafts sold to tourists in order to support the economies of women in South Africa. I bought several of these dolls a few years ago when I was fortunate enough to visit Capetown.

I bought many handmade things on that trip. A set of totebags weaved out of recycled tee shirts, a traditional rug and a set of bowls. Each of these items holds a prominant place in my office at work. In the years since the trip, they have become integrated in my daily routines and I hardly remark upon them unless someone  asks me where I got them because they aren't your usual midwestern handiwork.

But the dolls are different from my other purchases. I look at them all the time. In hindsight, I think they may be one of the major reasons I started making dolls. I initially bought them because they were aesthetically pleasing and featured beadwork. I started my crafting as a beader and the beadcraft of South African women is remarkable. Since the dolls ended up in my life, I have been more and more interested in the passing of dolls from woman to woman and I even started making my own. I think I was inspired by the fact that the dolls were made not as toys but to teach and as gifts from older women to younger with the hope for abundant living sewn into each one. Each time I look at my own pair of Ndebele dolls I feel the community of women behind them. I like that feeling.

I am deeply indebted to the makers of these traditional handmade dolls and can only dream of making things as beautiful and desirable as these.


Next time,
~Dee

Tuesday, December 28, 2010

4 Days of Christmas? Hey, What happened? :The Good, The Gooder and the Goodest

I looked back through my scheduled posts over the holiday and realized that only 4 of the scheduled 6 posts posted.

I was completely bummed. But then, before I could write about how bummed I was, I realized what had gone wrong and it was actually quite comical.  I had set the posts to post in 2011! Wha???? I was apparently thinking the new year had already begun. And in some ways for me, it already had.  2010 was a life changing year with lots of firsts - first baby, first house. I think that once baby H got here, I completely shifted gears and in my head, the year had already changed.  Then I spent all my free time over the last few weeks creating prototypes for the dolls I want to start selling and researching the best way to do this on the net. I think by the time I got around to setting up the blog, I was already 5 or so weeks ahead of myself.

So, what's the Good, the Gooder and the Goodest? (I'm being cheeky, in case you've stumbled on this blog and think I really use those non-words.)

Well, here's the Good. In a short span of time I've come to quite a few revelations about  how I should go about crafting this life of mine. I have a doable plan to get back into the swing of things at work after my maternity leave and now I'm more certain than ever that I want to make my hobbies work for me. Like most people, I'm really hard on myself. I have exceedingly high expectations for even the smallest things and when things don't turn out as I planned, I tend to beat myself up over it. This blog is supposed to be a release, a fun way to connect to the crafts I love, not a chore. I have to keep that in mind.

The Gooder - I have a husband who is the most supportive partner in the world. I'd like to think I knew this about him when I chose him, but I know that there is no way I could have known the depth of his support and kindness. He's even getting in on the act and helping me redesign the blog and set up the online shop. With his help, I know that I won't have to wory about the blog getting behind or about making errors of design and development for my web presence.

And the Goodest - Well, there's only one Goodest Thing in the World to me and that's this not quite 4 month old baby. She's a joy and a revelation in her own right. She inspires me to do more and to do better.


Happy Holidays and I'll be back soon!
~Dee

Wednesday, December 22, 2010

Day 3: Super Easy Crochet Skinny Scarf - Beginner Pattern

PC230458

Hi All,

I was going to put up photos of various bows that I have been attaching to things as of late but I decided that I needed a few more last minute gifts and suddenly the Super Easy Skimny Crochet Scarf was made.

Skill Level:
This pattern is a simple repeating Treble Crochet stitch worked in the front loop only.
Don't know how to do a Treble Crochet (tc)? See this tutorial

Not sure which part of a stitch is the front or back loop? See this explanation

Materials:
For this scarf you will need, about 1/3 of a skien of commercial, worsted weight yarn, some accent yarn for the tassels and a hook of a comfortable size.

Gauge:
Gauge is not important in this pattern. Pick a hook that works well with the yarn and your natural hand gauge. What's your hand gauge? Simple. Some people crochet tightly and some loosely. Your tendency to either extreme is your hand gauge. Me? I'm a tight crocheter. I have to be mindful not to make my stitches too tight. Sometimes to compensate for my tight hand, I use a large hooker to make gauge. But as I wrote earlier - GAUGE IS NOT IMPORTANT IN THIS PATTERN>

Abbreviations
ch = chain; tc  = treble crochet

Pattern:
ch 11
row 1 - TC in the fourth chain on the hook and each across to the end. (8 stitches) Ch 3,turn.
row 2  - TC in each stitch across working in the front loop only.  Be sure to put a stitch in the last position. (the pattern is easy an forgiving. Just try not to drop a stitch.)
row 3 until end - repeat row 2 until the scarf reaches your desired length.
PC230451 Remember not to drop a stitch at the end of the row!

Fringe: The row of fringe gives the skinny scarf a more professional finish. See here to learn how to make fringe.
PC230452 Fringe.

PC230457


Tips:
The scarf shown here is 56 rows long. You can make your scarf longer or shorter depending on your preference.

I was able to complete crocheting this scarf in 1 hour. It took an additonal 20 minutes to put the fringe on.


This scarf is quick and easy and its loose stitching gives it great drape. Make one or many for yourself or friends. It is a great way to get rid of a small ball of yarn.

Feel free to sell any scarf made from this pattern. Please link back to this original pattern if you refer to it even in ammended form.

Okay, so I'm off to be busy prepping for the holidays. I have SOO much to do. Like make 3 more of these scarves and play with this baby


Thanks for stopping by and come back soon.
~Dee

I've linked to the following parties:

Friday, December 17, 2010

Day 3: Easy Pearl and Tassel Earrings

My love of crafting started as a love of beading when I was very young. A friend of mine got a seed bead loom for a birthday, hated it, and gave it to me. I fell in love.

These days I love to incorporate beads into my yarn works and I make jewelry from both yarn and beads. 
The original version of the earring I am sharing here was made several years ago for a friend. She lost one at a party last Christmas and mentions them all the time, so I decided to make her another pair. I hope she likes them and I hope you do too. Feel free to email me if you have questions about the tutorial.

I haven't included instruction on how to make a tassel. There are a lot of great sites that show you how better than I could. See this site for example for an easy, no mistake way to make your tassel - http://www.nezumiworld.com/crochet_057.htm

For the tassels in my earrings I wrapped the yarn around 20 times for each earring. You should eyeball it and decide how full you want your tassel to be. 

Slide1

Slide2

Slide3

Slide4

Slide5

Slide6

Slide7


Slide8


Slide9

Slide10

I hope you like these earrings. I'm sure I'll post more varieties of yarn and bead earrings in the future.

Up next for Day 4 is a super easy crochet bow that can be made into a pin, a head band or as an accessory  for a Winter hat. 

Thanks for stopping by to see me!
Dee

I've linked this tutorial to the following parties:


Thursday, December 16, 2010

A Little Purple Elf Ami Ornament

I was supposed to be finishing up Christmas gifts BUT I logged on to Ravelry.com and ended up looking through the Amigurumi boards. And as usual, I wanted to make all the little crochet cuteness I saw there. Finding myself inspired - I decided to freehand a crochet elf in an ornament!

Strange, yes. But oh so cute!
Say Hello to Huber the Tree Elf

PC170357

PC170363


PC170356


I really do smile each time I look at his oddness.

For me, part of 'crafting a life' is about making things that are silly and fun and that ca put a smile on my face and the face of the people I give them to.

Another part of crafting a life as an urbanite is making crafts that fit my eclectic aesthetic. The jewelry project that is tomorrow's Day of Christmas is just that sort of craft. I'm off to smile at Huber and finish a variation of tomorrow's project!

I hope you're staying warm and well,
~Dee

Wednesday, December 15, 2010

Day 2: Easy Wire Wrap Christmas Tree Ornaments

PC150332

Day 2 of my 6 Days of Christmas is possibly the easiest, but also one of the most, chic crafts I've ever completed.

You'll need:
  • Heavier gauge beading wire. I used 20 gauge. If I were making these again and not trying to use up scraps from my other products, I would buy a wire one step thicker. 
  • Something shaped like a cone to wrap your wire around.
  • Beading tools - pliers to wrap ends and make embellishments
  • Optional - pipe cleaners and beads. 
It's easy as 1-2-3!

1. Make a loop in your wire. Pictured here the wire is still on the spool. I actually cut it after I made the loop. For the tallest tree I made (about 6 inches), I used around 2.5 feet of wire. I cut a yard to give myself some allowance when wrapping.
PC150304

2. Take your wire and begin to wrap it around your long, cone object. To secure it, pull the first wrap through the loop you made. Be sure to wind the wire tight and close on each wrap. See the photos for the steps. and yes, I did use an Exacto pen knife for my form. I made sure to tape down the cap to avoid injury. BE CAREFUL -- the wire can be a bit prickly too.

PC150305
Starting loop.

PC150315
Along the Exacto knife. You'll notice that for some rows I made little loops and swirls. Not too many because I wanted the cone to look like a cone. 


3. To finish, slip the wire shape off of the shape. Use your hands to shape it some more. Top off with a loop for the hook. I used a heart shape.

PC150344a
It was hard to take a picture that did the ornaments justice (mostly because I had the New Hope in one hand and the camera in the other). The wire is copper and looped over itself it is very bright.  


PC150346
PC150332
A few things to keep in mind: You have to wrap the wire pretty tight to get a smooth, uniform turn. I didn't worry about that so much. I liked the few wrinkles and waves created by putting the extra few loops on a row.

This project could be adapted to make picture holders or a centerpiece for a holiday table.

The next few projects I post will be versions of gifts I made for friends and family this season. I've also drawn up a new doll. Maybe I'll get a chance to make her this weekend.


Many thanks for stopping by,
~Dee

Things to think about

Tuesday, December 14, 2010

A Craft No? - Trying to Laugh at a Project Gone Wrong.

Ever start making something and put time and effort into and absolutely hate it when it's finished?

I feel like I need to submit my latest debacle to one of those websites that poke fun at crafts gone wrong. Problem is, right now, I'm a little sensitive about it. Weird, because I'm not usually the sensitive type.

I think what got me today was that I just finished the most successful month of crafting in my crafting life - and then I totally bombed. I made dolls, sold them. I've made some really cool things for the 6 days of Christmas here on Craftfro (Day 2 is tomorrow). I've completed a bunch of cute things for the little baby currently snoring in a cradle next to my desk and I even made some pretty nice Christmas gifts (and mailed most of them too!).

I was on a crafting high and I think I crashed.
Ever happened to you.


Tomorrow I'll be back with a more upbeat post and a tutorial. Promise.

~Dee

Monday, December 13, 2010

DAY 1: Hand Sewn Felt Bell Ornament

Day 1 of the 6 Days of Craft: A Felt Bell Ornament


Hi Good People,

I trust you're all keeping warm (or cool, depending on your clime). It's finally stopped snowing here but it's still cold.

I decided to break into my stash of craft goodies and make holiday stuff. The first thing I made is two bells using craft felt and embroidery thread.

This project is a quick make and can easily be modified in size and subject matter. If you don't like the bell I make here, you can draw your own design and use the technique to make a different ornament. This project is kid friendly if you use a bigger, less sharp needle. It can be done with yarn or thread and regular fabric.

Go here to see the step by step slides to make your own -- Felt Bell Ornament Tutorial on Flickr.
I chose to house it there because the slide show makes it easier to follow along than scrolling down the page in my opinion.

A few notes:
The key is to make loose long single stitches that are worked close together. Don't pull your thread too tight. Craft felt is stiff and will tear instead of stretching.
You don't have to cut out the bell like I do in the pattern. My husby suggested I do this. I normally would stitch around the square and hang it as a square with a bell center. I like the way it turned out but the others I make will keep their square shape.


PLEASE TELL ME WHAT YOU THINK OF THE BELL! If you make one, show me!

I've linked to the following parties:


Peas out,
Dee

Sunday, December 12, 2010

Crafting Confidence = Business plus preview of the 6 days of Christmas CraftFro style...

I have been super busy (what's new?) and I looked at the calendar today and realized that it's pretty much the end of the year and I have been in a whirlwind non-stop since 2010 began. Apparently, 1st babies will do that to you.

On the crating front, I've been busy making ornaments for the New Hope's first Christmas tree. Some out of crochet, some hand sewing and a few paper.

First Commission = Confidence Builder

I was fortunate enough to receive and complete my first special order of 7 desk dolls. It took a long time to complete them to my satisfaction but they were a big hit with the person who commissioned the pieces. It was scary to actually sell my work and I suffered from all sorts of low project esteem (is it good enough?) and self doubt (can I finish these on time?) I promised I wouldn't release any pictures of the dolls until they made it to their new homes after Christmas, so there are no photos. But maybe I will post a few in 2011!

I never thought that I could craft for supplemental income until I came up with the desk doll and there was this weird feeling that I had something unique and valuable to contribute that people might actually want to buy. They are the first things that I designed from head to toe and didn't use a pattern.

Don't get me wrong, I love patterns. I love FREE internet patterns. My crochet skills have improved 10fold in less than half a year because of internet patterns. I had to make and remake the most simple things until I got my confidence up to strike out and design my own stuff. And patterns made that possible. Next year I plan on featuring a weekly post on patterns that I followed.

Now, after these first commissions, I feel like I am ready to make a go of the business. The question is - what sort of business will I build? Will I just continue to do dolls on commission from groups like the one I made these first dolls for? or Will I branch out to sell the accessories I so love to make and design? If the latter is the case, I have to decide if I will open an Etsy store or if I will just stick to craft shows in my area. I have some idea which business type I'm leaning toward but I would love to hear what you think.

The blog is going to be revamped before 1-1-11. I have a new logo I've been working on and I think I may get my super Husby to retool the design to reflect the new business venture and my renewed commitment to chronicling my crafts online. I have a bunch of great ideas that I want share - now just to do it.

The 12 6 Days of Christmas Crochet and Crafts. (I was thinking 6 days but the 12 Days of Christmas song was apparently running in the background of my thoughts; When I looked at the post this morning I thought, OH NO! I can't believe I wrote 12. ;)
I've been working non-stop on Christmas projects for the tree and for gifts. I can't always spend this much time crafting so I am cherishing these snowy, cold days on which I have nothing scheduled for work.

I have come up with 12  6, quick, easy to make Christmas crafts that probably won't require a trip to the store. If you live anywhere in the Midwest, you'll understand why ---SNOW.

I have gotten the posts for most of the days together and look forward to hearing what you think about my 6  Christmas Crochet and Craft gifts.


And the New Hope ...
The New Hope has quite a few accessories that Mama CraftFro has made especially for her new baby. A few of these will appear as one of the 12 Days projects .. including this Big Bow Head Band and Christmas Hat....
Christmas Hat
Big Bow Headband


As always, Love and Peas...
Related Posts with Thumbnails