

I have a colleague who is beyond supportive and a great mentor. We recently went on a work trip together and she was a lifesaver. Her kindness and patience with my slow, tired 7 month pregnant brain and body made our co-presentation a success and resulted in a good boost for my career.
I decided to make her something as a thank you. But what?
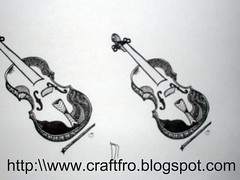
She'd commented on a doodle I'd drawn during a seminar and I'd joked that I'd doodle her a violin one of these days (she played semi-professionally for many years). I started out with just a doodle of a violin with some detailed pen work and then decided that I wanted something more involved than a sketch in a frame. It turned out great if I say so myself.
You can make one too!
Here's what I used:
A frame - Any kind will do, but I picked up one with some depth, almost like a shadow box for a 3D effect.
Craft Paper
Sketch
Craft Foam Sheet
Glue or some other adhesive - I used Elmer's Spray Adhesive
Embroidery Floss - I used this to frame the note tag inside and also to crochet a flower. If you don't crochet, a fabric flower would do.
ScissorsBeads
Other embelishments
You can assemble the frame components in any order.
He is how I made the violins:
The Violins
1. I drew a doodle of the violin and then printed it out on a fancy sheet of craft paper. I made two in two different sizes.
2. I cut out the violin sketches and adhered them to the sheet of craft foam and then cut the foam around the shape of the sketches.
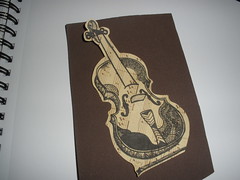
3. Then to add more depth to the violins, I sewed the strings on with black embroidery thread.
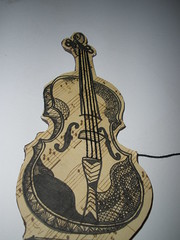 Front View
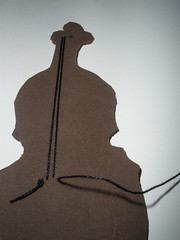 Back View
Finished Project:
I placed each component in the frame and used tape to secure the components into place.

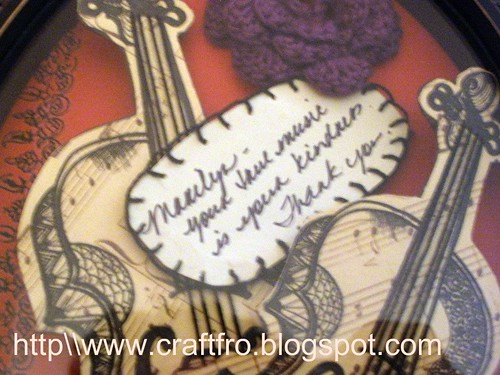 Close up!
I plan to give it to her tomorrow. I hope she will like it.
Tell me what you think,
~ Dee
It looks great, I know I would like it!
ReplyDelete