Showing posts with label crochet pattern. Show all posts

Thursday, August 25, 2011

Easy Crochet Wrap Bracelet #1


Easy Crochet Wrap Bracelet
Wrap bracelets are everywhere. I went to three different stores last weekend to buy gifts for friends and there were so many of these extra-long bracelets out there. I'm going to my first ever craft show (I've sold a few items at a show, but this will be my first foray into full out selling) and decided to make a few prototype crochet bracelets.

Chan Luu Wrap Bracelet Polyvore.com

 I love the look of these bracelets and so for the next few posts here I will show you what I came up with . Here's the really simple pattern for the Easy Crochet Wrap Bracelet #1 (at the beginning of this post).


Easy Crochet Wrap Bracelet #1

Please note: You can make this pattern for any reason, even to sell. But I reserve the copyright of the pattern and you should link back to this original post if you blog about this pattern or sell it online. 

Skills Needed to Complete this Pattern: You must be able to chain, single crochet, double crochet,  half double crochet, and be able to string beads onto your thread. A great resource for the basic crochet stitches is http://www.dummies.com/how-to/crafts-hobbies/Crocheting.html .

Materials Needed:
less than one oz of Crochet Cotton or Nylon in size 3. (You can use a lighter weight thread or heavier yarn, but you will have to adjust your starting chain to make it fit your needs.)
Size 1 crochet hook (again you can use a different size, but that will change your gauge)
approx. 2 dozen beads (my version has 26)
A yarn needle (that can slip through your bead holes, this is possible the trickiest bit of the whole pattern. Beads are finicky.)


Super Easy Instructions
Prep: Thread your beads onto your thread. It is better to put too many beads on, than too few.  For now, let the beads stay close to the skein and out of the way of your foundation chain. (explained below)


1: Make a foundation chain long enough to wrap around you wrist loosely at least 5 times.

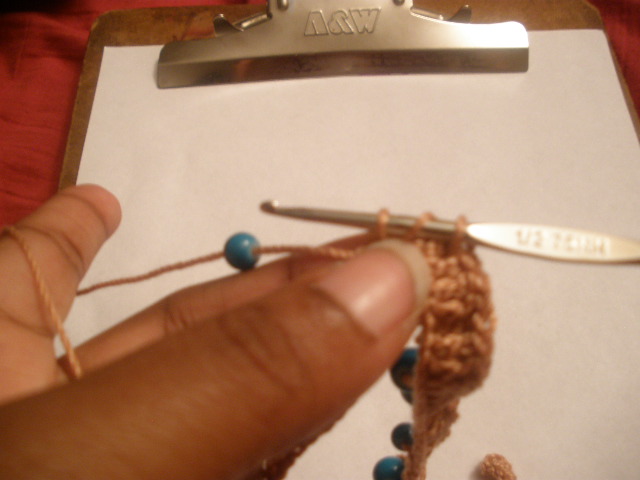
2: Double chain in the first 10 chains of the foundation chain.  Then, *yarn over insert into the next stitch of the foundation chain, pull up a loop (3 loops on hook), then slide a bead down to the hook. Yarn over pull through 2 loops, yarn over and pull through last two loops to complete the double chain. Double chain in the next 4 stitches of the foundation chain* repeat from star for 2/3rds of the length of your foundation chain.
3. When you get 2/3rds done, stop adding beads and double chains. Instead, single chain into the rest of the stitches of the foundation chain until you get to the 5th stitch from the end. There add a bead by pulling up a loop in the stitch, push down a bead and then complete the single stitch by yarning over and pulling through both loops on the hook. This will serve as the bead closure for the end of the bracelet.


4. Complete the row with single stitches.

5. You're pretty much done! I decided to add a little tassel to the end of my bracelet by knotting the end threads together (instead of weaving them back in) and knotting on a few additional pieces of thread.

And you're done!

To fit the bracelet, just wrap it around your wrist and push the first bead and last bead into the opening of one of the double chains of the bracelet. It may take a few tries to get it to fall where you want it too, but don't try to make it perfect. Part of the wrap bracelet appeal is its unstructured look.

backhand view
back of the wrist view


Please let me know (show me pictures!) if you make this bracelet!
My goal with the crochet patterns I share is always to share something that will bring joy to any who come across this page. Do let me know if you have questions.

See you soon with another wrap bracelet pattern!

~Dee

I linked up at:

The Girl Creative


The Girl Creative

Wednesday, December 22, 2010

Day 3: Super Easy Crochet Skinny Scarf - Beginner Pattern

PC230458

Hi All,

I was going to put up photos of various bows that I have been attaching to things as of late but I decided that I needed a few more last minute gifts and suddenly the Super Easy Skimny Crochet Scarf was made.

Skill Level:
This pattern is a simple repeating Treble Crochet stitch worked in the front loop only.
Don't know how to do a Treble Crochet (tc)? See this tutorial

Not sure which part of a stitch is the front or back loop? See this explanation

Materials:
For this scarf you will need, about 1/3 of a skien of commercial, worsted weight yarn, some accent yarn for the tassels and a hook of a comfortable size.

Gauge:
Gauge is not important in this pattern. Pick a hook that works well with the yarn and your natural hand gauge. What's your hand gauge? Simple. Some people crochet tightly and some loosely. Your tendency to either extreme is your hand gauge. Me? I'm a tight crocheter. I have to be mindful not to make my stitches too tight. Sometimes to compensate for my tight hand, I use a large hooker to make gauge. But as I wrote earlier - GAUGE IS NOT IMPORTANT IN THIS PATTERN>

Abbreviations
ch = chain; tc  = treble crochet

Pattern:
ch 11
row 1 - TC in the fourth chain on the hook and each across to the end. (8 stitches) Ch 3,turn.
row 2  - TC in each stitch across working in the front loop only.  Be sure to put a stitch in the last position. (the pattern is easy an forgiving. Just try not to drop a stitch.)
row 3 until end - repeat row 2 until the scarf reaches your desired length.
PC230451 Remember not to drop a stitch at the end of the row!

Fringe: The row of fringe gives the skinny scarf a more professional finish. See here to learn how to make fringe.
PC230452 Fringe.

PC230457


Tips:
The scarf shown here is 56 rows long. You can make your scarf longer or shorter depending on your preference.

I was able to complete crocheting this scarf in 1 hour. It took an additonal 20 minutes to put the fringe on.


This scarf is quick and easy and its loose stitching gives it great drape. Make one or many for yourself or friends. It is a great way to get rid of a small ball of yarn.

Feel free to sell any scarf made from this pattern. Please link back to this original pattern if you refer to it even in ammended form.

Okay, so I'm off to be busy prepping for the holidays. I have SOO much to do. Like make 3 more of these scarves and play with this baby


Thanks for stopping by and come back soon.
~Dee

I've linked to the following parties:

Related Posts with Thumbnails