Showing posts with label bracelet. Show all posts

Thursday, August 25, 2011

Easy Crochet Wrap Bracelet #1


Easy Crochet Wrap Bracelet
Wrap bracelets are everywhere. I went to three different stores last weekend to buy gifts for friends and there were so many of these extra-long bracelets out there. I'm going to my first ever craft show (I've sold a few items at a show, but this will be my first foray into full out selling) and decided to make a few prototype crochet bracelets.

Chan Luu Wrap Bracelet Polyvore.com

 I love the look of these bracelets and so for the next few posts here I will show you what I came up with . Here's the really simple pattern for the Easy Crochet Wrap Bracelet #1 (at the beginning of this post).


Easy Crochet Wrap Bracelet #1

Please note: You can make this pattern for any reason, even to sell. But I reserve the copyright of the pattern and you should link back to this original post if you blog about this pattern or sell it online. 

Skills Needed to Complete this Pattern: You must be able to chain, single crochet, double crochet,  half double crochet, and be able to string beads onto your thread. A great resource for the basic crochet stitches is http://www.dummies.com/how-to/crafts-hobbies/Crocheting.html .

Materials Needed:
less than one oz of Crochet Cotton or Nylon in size 3. (You can use a lighter weight thread or heavier yarn, but you will have to adjust your starting chain to make it fit your needs.)
Size 1 crochet hook (again you can use a different size, but that will change your gauge)
approx. 2 dozen beads (my version has 26)
A yarn needle (that can slip through your bead holes, this is possible the trickiest bit of the whole pattern. Beads are finicky.)


Super Easy Instructions
Prep: Thread your beads onto your thread. It is better to put too many beads on, than too few.  For now, let the beads stay close to the skein and out of the way of your foundation chain. (explained below)


1: Make a foundation chain long enough to wrap around you wrist loosely at least 5 times.

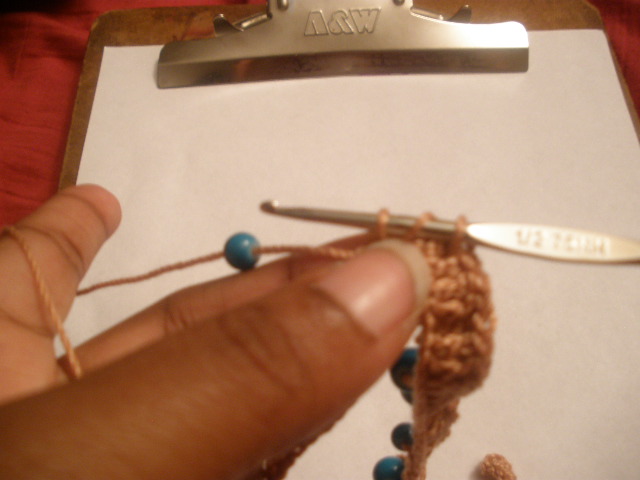
2: Double chain in the first 10 chains of the foundation chain.  Then, *yarn over insert into the next stitch of the foundation chain, pull up a loop (3 loops on hook), then slide a bead down to the hook. Yarn over pull through 2 loops, yarn over and pull through last two loops to complete the double chain. Double chain in the next 4 stitches of the foundation chain* repeat from star for 2/3rds of the length of your foundation chain.
3. When you get 2/3rds done, stop adding beads and double chains. Instead, single chain into the rest of the stitches of the foundation chain until you get to the 5th stitch from the end. There add a bead by pulling up a loop in the stitch, push down a bead and then complete the single stitch by yarning over and pulling through both loops on the hook. This will serve as the bead closure for the end of the bracelet.


4. Complete the row with single stitches.

5. You're pretty much done! I decided to add a little tassel to the end of my bracelet by knotting the end threads together (instead of weaving them back in) and knotting on a few additional pieces of thread.

And you're done!

To fit the bracelet, just wrap it around your wrist and push the first bead and last bead into the opening of one of the double chains of the bracelet. It may take a few tries to get it to fall where you want it too, but don't try to make it perfect. Part of the wrap bracelet appeal is its unstructured look.

backhand view
back of the wrist view


Please let me know (show me pictures!) if you make this bracelet!
My goal with the crochet patterns I share is always to share something that will bring joy to any who come across this page. Do let me know if you have questions.

See you soon with another wrap bracelet pattern!

~Dee

I linked up at:

The Girl Creative


The Girl Creative

Wednesday, March 23, 2011

Chain Stitch Crochet Charm Bracelet: Now that's a mouthful!

 Hey You Beginning Crocheter (or you seasoned vet, or you non-crocheter)!


Make the easiest crochet charm bracelet ever!

You'll need these materials:
Nylon Trim from JoAnn's Fabric. 35 cents on sale!
A length of decorative, round nylon trim  -- You'll want it to be 2 1/2 times the size of the wrist. Also, the ideal thickness to achieve the chain link look is 1/8th of an inch
H/8 Crochet hook -- I used a plastic hook. The trim slipped over it easily and it was easy to keep the tension
Charms and Beads -- I like the minimalist look, but the bracelet can support as many as you'd like
Jump Rings - to attach the charms and beads to your bracelet.

You'll Need the Following Techniques:
Chain Stitch Crochet -- A great tutorial can be found here
Sliding Knot -- A great tutorial can be found here

Okay, so this is super easy.
1. Make a slip knot with the trim. You want to leave about a 3 inch tail.
Tying a slip knot with the trim can be a little tricky because of its firmness and slippery texture. Just fiddle with it until the knot forms and stays knotted.
2. Chain stitch as many times as you need to create a length that can wrap around your wrist and not overlap. 
The nylon trim is super forgiving. You can adjust the shape of the chain with your fingers as you go.
3. Pull the last loop all the way through the stitch to create a knot at the end. You may want to tie another knot right next to it for added security. 
Looks a lot like chain links when you're done.

4. Tie a sliding knot over the two ends. If you think you have to much excess length, now is the time to cut them. BUT remember to leave enough length on both ends to tie a knot at the end to keep them from slipping all the way through the sliding knot. You can also burn the ends of the trip to make sure they don't unravel.

The Sliding Knot is a great technique for all sorts of projects.

5. Add your beads and charms. I added a bead dangle to one of my ends. I find that it not only adds a nice finishing touch, but that the weight of the bead keeps the bracelet from pulling apart during the day.


I'm a minimalist about charms, so I only added 3. A photo bead of my little H. making a silly face, a bead dangle and a heart. But you can add as many as you'd like.


This bracelet's materials cost less than $2 when I divide how much of materials I used (length of cord from spool, charms from sets).  The thrifty side of me loves it, the urban wannabe fashionista does too!


If you make one of these bracelets, I'd love to see it!  The possibility for the trim and crochet seem endless. I'll be posting about a necklace I made with it soon.


Peas and Carrots, 
~Dee

I've Linked this Tutorial to:
Related Posts with Thumbnails